These skin tears are made from chicken skins and mashed banana with food colouring. The skins are folded over to create two layers. A ‘skin tear’ is cut into the top layer and the skin flap (if there is one) crumpled to the edge. Then variously coloured banana mashings are added to give the students something to clean away. To create a bruised appearance food colouring is rubbed into the underside of the skin, this gives a good appearance of depth to the colour.
The aim is to give students the chance to feel what it is to clean and re-align a skin tear without fear of hurting someone.
Students are also given an assessment form, solutions and tools for cleaning, dressing products to choose from, a full history for their “patient” and are asked to follow the hospital’s wound care protocol for skin tears including correct documentation and categorization (STAR) of the tear.
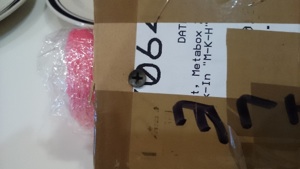
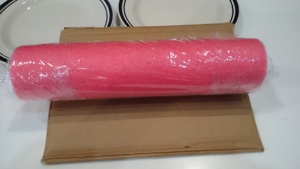
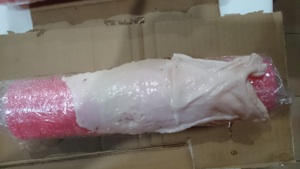
Pool noodles are such handy items to have. They may have started life as simple pool toys but in the hands of the wound care practitioner they can be so much more! Have a pesky cross bar on a wheelie walker that your patient keeps kicking and taking skin of their toes? Split this noodle open lengthwise and use it to cover the pesky cross bar! Or, in this case, make a skin tear model from it. Wrap your noodle in cling wrap and secure it to a base. I used a large square of sturdy cardboard. I’ve secured the the noodle to the cardboard with three screws.
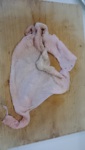
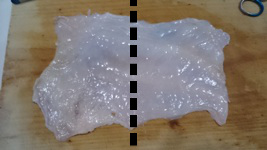
I ask my local butcher to collect some chicken skins for me. I lay them out, skin side down and trim the excess fat and square them up to make them easier to work with (photo middle). The middle photo below has a dotted line dividing the chicken skin into left half and right half. Using sewing pins secure the left half of the chicken skin, skin side down, to the pool noodle. The right half is now ready to be folded over to make the skin tear layer ... but not yet. First we need to prepare the blood and slough.
This is all about being creative. I had some old bananas handy so that’s what I used. I also like my bugs so added a bit of yellow for s aureus and some green for p aerurginosa. The main thing is to have something there that needs to be cleaned away. I also have some red and blue food colouring which I paint on with a cotton tip swab to create the appearance of bruising.
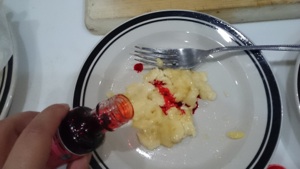
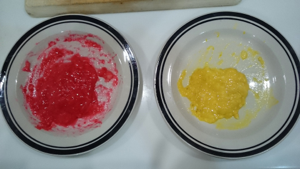
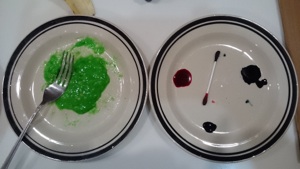
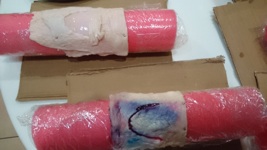
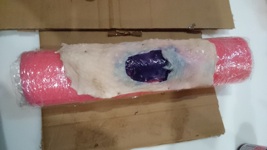
With the skin model still fully laid out, paint your red and blue food colouring on the fatty side. When you fold the right half of the chicken skin over the left half the colouring will penetrate through the skin, resembling bleeding into the dermis. I like to discuss with the students what seeing this discolouration might mean for healing. What’s happened to the local blood supply and subcutaneous structures? What kind of force would this have been and what does that mean for the local tissues? etc... With a sharp pair of scissors cut a (roughly) V shaped flap into the right half of your chicken skin. This is your skin tear and you can decide the shape of the flap and how much flap you want left attached. The photo below left shows a skin tear where 25% flap remains and there is no discolouration (STAR Cat 2a), the model below it has 100% of its flap with discolouration (STAR Cat 1b) and the one of the right has no flap (STAR Cat 3).
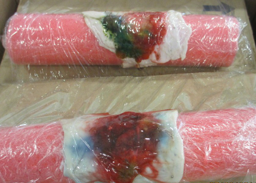
Spread your blood/slough generously around your skin tear, tuck some under the flap, scrunch the flap up, etc...
I put a layer of plastic wrap over the finished model and store it in the fridge over night. I have found that this causes the colours to bleed a bit more and ‘soften’ the look.
I’m cheap and like to re-use things, hence the plastic wrap on the pool noodles. All the pins and screws I use are stainless steel, I wash them with soap and water and dry them. All the chicken and plastic is disposed of appropriately and the pool noodles are also washed with soap and water. It takes me about 2 hours from start to finish to make the batch shown above, and most of that time is spent trimming up the chicken.
To download the pdfs of the training guides select from the following:
© 2025 Wound Care Resource All rights reserved | Web template modified from W3layouts